Showing posts with label photo. Show all posts

Thursday, October 8, 2009

New tutorial available

Finally got another tutorial ready.

Here is a tutorial on light retouching of a portrait
Light retouching - create clear portrait


Before


After


Friday, July 3, 2009

Family photos...

So I did fall behind on the uploading of family photos...
Just a little bit... Since March that is..

Here are all family photos that I finally got uploaded:


Thursday, March 12, 2009

End the week the fun way...

Browsing through photos here and there sometimes I stumble on some pretty hmm different things.

Remember back when UFO's was the big topic? Back with the crop circles and all the UFO spotting here, there and everywhere?

One web site hosting some photos is the ECETI (Enlightened Contact with ExtraTerrestial Intelligence).

On the front page they have this photo of "Tensor transmission and probe"


and in the UFO photographs they have a photo of "A Fighter Jet Chases a UFO Near Mt. Adams".


I thought that stuff was looooong gone. If by chance you are interested in buying a photo or two of blurred birds jets chasing UFO's please send me an email. I got a few but only for the ones that are seriously interested (got too much money to spend on nothing).

Wednesday, January 14, 2009

From the great outdoors...

Sooo I had a few opportunities for taking the camera outdoors over the weekend. That as you would know is pretty cool :-) However that particular weekend of course had to be rainy, cold and windy. So I did a few photos with the birds in front of the house and as you can see it was a little wet for them...


Ok I have to admit that Sunday morning is kind of slow for me. I am not exactly jumping out of bed at 4am to run out and get some great photos. But Emma spotted a new visitor on our deck and well I thought it would be long gone before I would have a chance to take a photo through the kitchen and windows.

But I got that one :-) As you can see the distance, light and window didn't do the photo much good though.


When it took off it landed in a tree in the back yard. So on to the next window...
yeah shooting through the window and with the screen it didn't really work too good either.


Knowing there was a chance it would fly away I was sneaking out on the deck. Yeah no time for silly things like a jacket, shoes and all those comforts. So tip-toeing over the wet and might I add Cold deck wasn't really a big pleasure...

This worked better but as you can see I wasn't pleased with the angle and the branch deciding to be in my way.


Despite I didn't really get dressed yet. I got jacket and shoes and tip-toed around the house. I figured that eventually it would get scared off so my tactic was to take a "roll" of photos and try moving a bit closer.

I ended up with about 200 photos and here is a selection of the keepers.


The hmm sort of funny thing about all of those is that I took them standing in my pj's in the back yard with the cold freezing wind blowing up under my jacket, fingers freezing and eyes tearing from the cold wind and end up with these photos.
Other times I am heading to the mountains hiking up and down in search for something like this but come home with nothing like it...


Ohh btw. I think it's a Coopers hawk that's about a year old or so. Once it grows up it will have red eyes and the chest colors and pattern will change.
Here is more info on Cooper's hawk

Wednesday, December 10, 2008

Making of a Christmas photo

Creating the Christmas photo of the year is always an interesting adventure. It looks so easy when all you see is the finished result.

However getting the right idea and setup is just the small issues compared to getting a toddler to "play-along" with the idea and "vision"....

Just to illustrate it. Here are a series of photos from the making of the Christmas photo.

Illustration and showing what to do is always a good place to start. So mom is showing Emma what to do with all the weird stuff dad put up.

Just look in the box to see what's in there... like this


What's in there??? I don't see anything? what is it, what is it...


And a little game of peek-a-boo... well why not ;-)


Some times when you tell the most famous toddler to look what's in the box... well you know she was looking to see what she could find. Since she couldn't see much in it... yeah .... go digging ;-)

But daaaad you told me to find something in the box...


Ok Emma.... Just look in the box like this and sit still while doing it. Maybe even put on a little smile :-)


gggg I am done looking in that box.... come on.... It's EMPTY!!!!


ok ok so we are done.... Here is the resulting (picked) photo.


ohh btw. it isn't all just torture... there is a little bit of fun in there too...
like doing a little dress up


and using the timer to get both of us (yeah that's a cheese stick in her hand)


That's a wrap... eh... hmm no phun intended ;-)

Saturday, November 15, 2008

Dark field photo

I started reading a new book on photography and lighting in particular.

It's the book Light science and magic. This is a very good aid in learning about light and why light acts the way it does.

So it goes into angles, light types and reflections.

Reading the book you will want to try out some of the things described. And one thing that I just tried out is photographing glass ware. First try is with the dark field where the background is black and the edges of glassware is standing out.

It's a first shot at it. But given I haven't tried before I don't think it's tooo bad ;-) But hey judge for yourself :-)


ps. If you haven't looked at my new website lately go ahead and check it out here: http://udsigt.webhop.net

Tuesday, July 1, 2008

Photos of smoke - studio setup and lighting

More in this series:
- Photos of smoke post processing
- Photos of smoke photo exhibit

First things first...
Here is a post on how I did the setup in the studio for photographing smoke. Also know as smoke art, artistic smoke, smooth waves and so on but it's still the same.
Some have a black background others are on white.
Common for all the photos (and well I prefer it that way) these photos requires a contrasting background meaning it has to be black.

Now you could start using a flash light, "normal" light, sun light or well just about any old light out there. However I prefer to have nice crisp lines which affects the approach quite a bit.
To get the crisp lines it requires a relatively small aperture. I started out using a f/5.6 or so and that just didn't work out too good. Way to "fuzzy" so here for the second round I chose f/16 (bigger number smaller aperture) to increase the depth of field and thus the sharpness of the photo. Another factor is that smoke is moving and to get the clean lines the shutter speed has to be able to freeze the smoke so I went with 1/250 for my shutter.

With the above settings it means that no flashlight or sun light is going to give you enough pow to actually light the smoke enough. Adding more light also means that it has to be controlled. If light is spilling on the background it doesn't come out as being black and there goes your clean photo.

For this setup I used an alienbee ab800 with the reflector and a cardboard tube to control the light and make sure no light is reflected from the background or below.
On the left side I used a Nikon SB-800 with a home made snoot. For this I intended the SB-800 to have a lower intensity than the alienbee but more about that later :-)


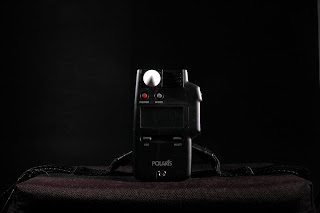
The first three photos above is my initial adjustment shots. I started out setting up the alienbee unit and measured it to f/16. Then adding the SB-800 and measuring it to f/11 (one stop under).
#1 left side is a little to weak, #2 left side just about right and #3 now I think I got them adjusted where I would like them to be :-)

But wait... it ain't over just yet.

Backup and check how the overall light falls.


As you can see some of the left side light is falling on the background which is one thing to avoid.
Here I turned the SB-800 a little bit towards the camera to avoid too much light splashing on the background.


Looks good right?
This is just about how I wanted it to turn out. However.


However my plan wasn't to get a couple hundred shots of my light meter so adjust the view to be a little wider and cover some more grounds... ouch... this is what you call lens flare (you may have to click the photo to get the full size).
This is caused by the left flash pointing too much towards the camera and the light is falling directly into the lens.


Fixing the lens flare is easy. Just turn the flash away from the lens.
But now the light is spilling on the background.... ggg


Ok, adjust the snoot to try and block the light with that. But still there are a little bit too much light on the background soo try again.


Another adustment of the snoot and move the left flash a bit.


Now we are almost there. Finally I moved the left flash out a couple of feet and increased the output. Just about where I want it.
So Now I got my f/16 @ 1/250s and a black background :-)


Let's back on out and see how that looks.


Just a final light meter shot to make sure it's still there.


Soo all there is left is to bring in the incense sticks and fire it up :-)
ohh yeah well btw. if you got some sensitive noses around the house you may want to check with those first or give them a heads up.
Incense can be detected and the scents are many. I am not a big fan but hey makes some nice somewhat controllable smoke that can be used for creating photos.

When the incense stick is smoking the smoke will most likely "just" rise straight up and give you a white line.


To avoid the white line going straight up in the air or well to actual create something a wee bit more interesting you can modify the smoke stream. This can be done with just about anything like... your hands (ps. here goes the disclaimer... don't touch the glowing incense stick.... it's hot!!!)


Or you can use a spoon (another disclaimer... don't use the nice silverware for this. Might get you in a bit of trouble).


And here is a test shot without any objects in the way ;-)


All that's left is in post processing. More info on this will be available in my photoshop section (http://photoshopandsuch.blogspot.com/) but here is a little teaser for one of the options you have with the smoke photos.


More in this series:
- Photos of smoke post processing
- Photos of smoke photo exhibit

Tuesday, June 24, 2008

Tickle me Tuesday


It's Tuesday and time for a little fun.

So I was lucky getting one of the books I wanted to get. It is called The moment it clicks by Joe McNally.

ohh and should you be tempted to buy the book (which I can only recommend) get it at Amazon and save $20...

In the section I was reading last night he had a pretty darn good quote.
"Face it we are emotional people. When we get the photo we are like six years old running up to the teacher with a look what I did, look what I did".

And reading this just after I created a good print and running up to Jacki telling her how great it looked.... well 'nuff said on that one ;-)

Reading a lot of books and magazines on photography there are always some that have the opinion that everything can be fixed in photoshop.
Sometimes however... it doesn't really turn out the way it should... Take Sears as an example(look at her left hand):


Just for the record. I didn't change the above. Check out the Sears web page to see the original.

Have a great Tuesday and have fun with the other Tickle me Tuesdays...

Tuesday, June 17, 2008

Tickle me Tuesday.


It's Tuesday and time for a little fun.

I have previously been referred to as the Japanese tourist when lining up getting ready to take a few photos. Now have you ever wondered what it looks like when photographers from all over go to Japan to cover a sports event?

I guess it's just one of those Japanese things but I bet it's efficient and all photographers get a chance to get the "good" shot.


Speaking of good shots. I have also heard remarks about how I sometimes will bend slightly to frame the photo just right or well sometimes be close to flat on my belly on the ground. But you know.... whatever it takes to frame the shot just right...
However seems to be jumping to get a photo of me when I am photographing bugs or doing something different to frame the shot... Ohh and here is a text book example on how sometimes you have to adjust your posture to get the photo framed just right.


Speaking of cameras and settings. You know how there are settings with mountains, stick people and a little flower on your camera. The presets that are preprogrammed to optimize the exposure for that particular subject.
Well check out this one. It had to come around eventually ;-)


Have a great Tuesday and have fun with the other Tickle me Tuesdays...