More in this series:
-
Photos of smoke post processing -
Photos of smoke photo exhibitFirst things first...
Here is a post on how I did the setup in the studio for photographing smoke. Also know as smoke art, artistic smoke, smooth waves and so on but it's still the same.
Some have a black background others are on white.
Common for all the photos (and well I prefer it that way) these photos requires a contrasting background meaning it has to be black.
Now you could start using a flash light, "normal" light, sun light or well just about any old light out there. However I prefer to have nice crisp lines which affects the approach quite a bit.
To get the crisp lines it requires a relatively small aperture. I started out using a f/5.6 or so and that just didn't work out too good. Way to "fuzzy" so here for the second round I chose f/16 (bigger number smaller aperture) to increase the depth of field and thus the sharpness of the photo. Another factor is that smoke is moving and to get the clean lines the shutter speed has to be able to freeze the smoke so I went with 1/250 for my shutter.
With the above settings it means that no flashlight or sun light is going to give you enough pow to actually light the smoke enough. Adding more light also means that it has to be controlled. If light is spilling on the background it doesn't come out as being black and there goes your clean photo.
For this setup I used an alienbee ab800 with the reflector and a cardboard tube to control the light and make sure no light is reflected from the background or below.
On the left side I used a Nikon SB-800 with a home made snoot. For this I intended the SB-800 to have a lower intensity than the alienbee but more about that later :-)
The first three photos above is my initial adjustment shots. I started out setting up the alienbee unit and measured it to f/16. Then adding the SB-800 and measuring it to f/11 (one stop under).
#1 left side is a little to weak, #2 left side just about right and #3 now I think I got them adjusted where I would like them to be :-)
But wait... it ain't over just yet.
Backup and check how the overall light falls.

As you can see some of the left side light is falling on the background which is one thing to avoid.
Here I turned the SB-800 a little bit towards the camera to avoid too much light splashing on the background.

Looks good right?
This is just about how I wanted it to turn out. However.

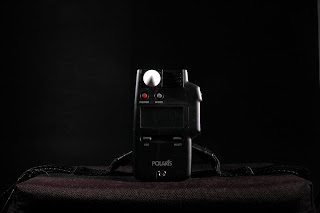
However my plan wasn't to get a couple hundred shots of my light meter so adjust the view to be a little wider and cover some more grounds... ouch... this is what you call lens flare (you may have to click the photo to get the full size).
This is caused by the left flash pointing too much towards the camera and the light is falling directly into the lens.

Fixing the lens flare is easy. Just turn the flash away from the lens.
But now the light is spilling on the background.... ggg

Ok, adjust the snoot to try and block the light with that. But still there are a little bit too much light on the background soo try again.
Another adustment of the snoot and move the left flash a bit.

Now we are almost there. Finally I moved the left flash out a couple of feet and increased the output. Just about where I want it.
So Now I got my f/16 @ 1/250s and a black background :-)

Let's back on out and see how that looks.

Just a final light meter shot to make sure it's still there.

Soo all there is left is to bring in the incense sticks and fire it up :-)
ohh yeah well btw. if you got some sensitive noses around the house you may want to check with those first or give them a heads up.
Incense can be detected and the scents are many. I am not a big fan but hey makes some nice somewhat controllable smoke that can be used for creating photos.
When the incense stick is smoking the smoke will most likely "just" rise straight up and give you a white line.

To avoid the white line going straight up in the air or well to actual create something a wee bit more interesting you can modify the smoke stream. This can be done with just about anything like... your hands (ps. here goes the disclaimer... don't touch the glowing incense stick.... it's hot!!!)
Or you can use a spoon (another disclaimer... don't use the nice silverware for this. Might get you in a bit of trouble).

And here is a test shot without any objects in the way ;-)

All that's left is in post processing. More info on this will be available in my photoshop section (
http://photoshopandsuch.blogspot.com/) but here is a little teaser for one of the options you have with the smoke photos.

More in this series:
-
Photos of smoke post processing -
Photos of smoke photo exhibit


